
Edit: Using Bridge.NET, this interpreter can now run in your browser! Click here to see a live playable demo!.
A few weeks ago after watching a few episodes of Ferris Makes Emulators where Jake Taylor is live-streaming building an N64 emulator in Rust I decided it might be a fun project to try and build my own. Since I’ve never built an emulator before (and my knowledge of assembly is fairly weak) I thought the NES would be a good choice and although I want to learn some new languages I thought I’d start with C# and once I understand how to actually make an emulator I can build in something like Rust.
The current code for DaNES is on GitHub but to cut a long story short, I’m stuck on the rendering. While taking a little break from it I thought it might be wiser to try something simpler like Chip-8. Maybe coming back to the NES with a fresher pair of eyes will make things easier!
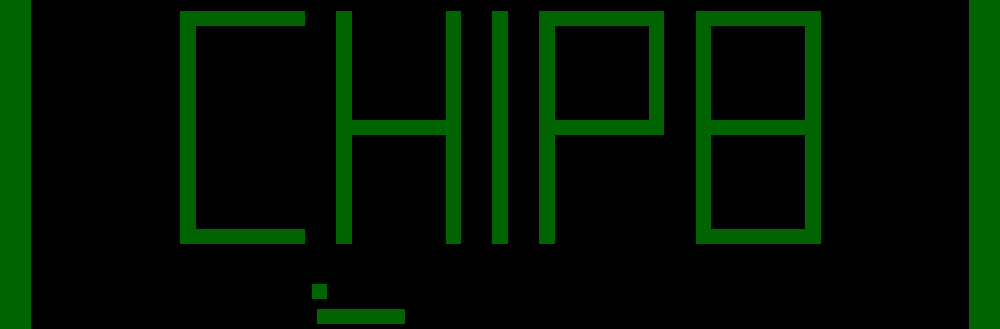
So, the new project is DaChip8 (also on GitHub). It’s working and seems to run all the ROMs I’ve tested fine :) Here’s some on how it works for any other newbies that want to give it a shot. Some of the code is a bit messy as I was “learning on the job” but the main implementation of the chip is pretty clean (I think).
Here’s a video of it in action:
Chip-8 isn’t a physical device like a NES so what we’re building is really an interpreter or VM. Because of this, multiple hardware platforms can(/did) support Chip-8 and games/apps don’t need to be re-written for different hardware. Unfortunately there doesn’t seem to be a defined clock speed for Chip 8 and games were not written to adapt so games will run faster on faster chips. We’ll have to artificially run ours slower because hardware today is so much faster (such as by controlling the rate at which we call Tick).
I implemented my chip as a class in C#. All registers are contained within it and it exposes two methods, Tick and Tick60Hz which are controlled externally. Tick is intended to be called at the clock speed (which I’m considering somewhere between 500Hz-1Mhz) and Tick60Hz needs to be called 60 times per second (this is because there are two registers for Delay and Sound which must decrement at this rate).
Here’s a list of the fields in my Chip8 class and what they are:
// Constants for screen size
const int ScreenWidth = 64, ScreenHeight = 32;

// A buffer containing a bool for each pixel on the screen (Chip-8 was monochrome)
bool[,] buffer = new bool[ScreenWidth, ScreenHeight];

// Actions that the chip should invoke (draw will be called from inside Tick60Hz, beep whenever we need to beep).
// These are passed in on the constuctor since they'll generally by implemented in some platform-specific way.
Action<bool[,]> draw;
Action<int> beep;

// Chip-8 has 16x 8-bit registers (referred to as V) which we'll store as byte[16].
// As with most things in this file, we'll use hex to refer to things, so these
// are V[0x0] to V[0xF]. The last register, V[F] is also used for special purposes
// such as a carry and collision flag.
byte[] V = new byte[16];

// There are supposed to be two timers (Sound, Delay) but the easiest way for me to implement a beep
// was with Console.Beep(frequency, duration) so rather than have a Sound timer that counts down
// I just immediately start playing for the given duration. This might not be perfect (you can't
// cancel an in-progress sound) but I suspect in reality it works for all games.
byte Delay;

// The address register (referred to as I) is 16-bit and is used store memory addresses such as
// when rendering sprites.
ushort I;

// The program counter (where we're currently executing instructions from) is also 16-bit and
// This starts at the location 0x200 (512) because the first 512 bytes were used by the interpreter.
// We use 0x0 to 0x200 to store things like the built-in font data.
ushort PC = 0x200;

// The Chip-8 stack is only used to store program counter locations when jumping to subroutines.
// We use an array that can store 16 addresses and a single byte to index into it. Whenever jumping to
// a subroutine we will push the program counter (PC) to the stack (Stack[SP]) and increment SP
// (the stack pointer). When we need to return, we will decrement SP and then read the address to return
// to from Stack[SP].
byte SP;
ushort[] Stack = new ushort[16];

// The original Chip-8 systems had 4K (0x1000) of addressable memory.
byte[] RAM = new byte[0x1000];

// To enable fast lookups of functions to execute for each opcode, we use a dictionary.
// Normally we use the first nibble (4 bits) of the two-byte instruction to decide what to do,
// however there's a bunch of random instructions all lumped into the 0xF000 nibble so we have
// an additional dictionary to look them up based on the second byte.
Dictionary<byte, Action<OpCodeData>> opCodes;
Dictionary<byte, Action<OpCodeData>> opCodesMisc;

// One of the instructions is to generate a random number, so we'll need this.
Random rnd = new Random();

// We also need to keep track of which keys are currently held down. Chip-8 had a 16-key keyboard
// much like a numeric pad with A-F around the edges:
//    1   2   3   C
//    4   5   6   D
//    7   8   9   E
//    A   0   B   F
// We store these in a HashSet to allow easy checking of whether a key is down.
HashSet<byte> pressedKeys = new HashSet<byte>();
For building and testing, I used ROMs from the Chip-8 Pack. As far as I can tell these are all games written by hobbyists and freely distributable/usable.
For loading a ROM, we simply read the bytes from the file and write them into RAM starting at 0x200 (as explained above):
public void LoadProgram(byte[] data) =>
    Array.Copy(data, 0, RAM, 0x200, data.Length);
The way opcodes are interpreted is generally based on the first nibble (4 bits). There’s a great table on Wikipedia which I won’t duplicate here, but here are a few examples:
1NNN    Jumps to address NNN.
5XY0    Skips the next instruction if VX equals VY.
Where you see N, X or Y in these instructions, those are placeholders. Other values (from 0 to F) are the bits being matched. The placeholder values also fall into the same pattern, so we can easily assign names to each part of the instruction:
X = second nibble
Y = third nibble
N = final (fourth) nibble
NN = second byte
NNN = last three nibbles
To make the opcode methods have the same signature, I wrapped this data up in a struct. Now every opcode instruction function just takes an OpCodeData which looks like this:
struct OpCodeData
{
	public ushort OpCode;
	public ushort NNN;
	public byte NN, X, Y, N;
}
Now we know how opcodes are laid out, we can build our dictionary based on the first nibble (and in the case of the misc instructions, the second byte):
opCodes = new Dictionary<byte, Action<OpCodeData>>
{
	{ 0x0, ClearOrReturn }, // There are two instructions starting with a 0 nibble, didn't seem worth its own dictionary
	{ 0x1, Jump },
	{ 0x2, CallSubroutine },
	{ 0x3, SkipIfXEqual },
	{ 0x4, SkipIfXNotEqual },
	{ 0x5, SkipIfXEqualY },
	{ 0x6, SetX },
	{ 0x7, AddX },
	{ 0x8, Arithmetic },
	{ 0x9, SkipIfXNotEqualY },
	{ 0xA, SetI },
	{ 0xB, JumpWithOffset },
	{ 0xC, Rnd },
	{ 0xD, DrawSprite },
	{ 0xE, SkipOnKey },
	{ 0xF, Misc }, // This will do a lookup from the second dictionary
};

opCodesMisc = new Dictionary<byte, Action<OpCodeData>>
{
	{ 0x07, SetXToDelay },
	{ 0x0A, WaitForKey },
	{ 0x15, SetDelay },
	{ 0x18, SetSound },
	{ 0x1E, AddXToI },
	{ 0x29, SetIForChar },
	{ 0x33, BinaryCodedDecimal },
	{ 0x55, SaveX },
	{ 0x65, LoadX },
};
Next we need to implement our Tick function which will read a two-byte opcode from RAM at the location the Program Counter (PC) points to then look up the instruction using the first nibble. When implementing this I found there were some instructions in the misc section that we don’t care about so I skipped over them (rather than crashing).
public void Tick()
{
	// Read the two bytes of OpCode. This is big-endian which means
	// the most significant byte comes first. We shift it 8 bytes to
	// the left then bitwise-or it with the next byte to get the full
	// 16-bit value.
	var opCode = (ushort)(RAM[PC++] << 8 | RAM[PC++]);

	// Write the PC and the OpCode we read for debugging.
	Debug.WriteLine((PC - 2).ToString("X4") + ": " + opCode.ToString("X4"));

	// Split data into the possible formats the instruction might need.
	// https://en.wikipedia.org/wiki/CHIP-8#Opcode_table
	var op = new OpCodeData()
	{
		// We use bitwise-and with a mask to extract specific nibbles.
		OpCode = opCode,
		NNN = (ushort)(opCode & 0x0FFF),
		NN = (byte)(opCode & 0x00FF),
		N = (byte)(opCode & 0x000F),
		X = (byte)((opCode & 0x0F00) >> 8), // Where don't use the lower nibbles, bitshift right to get just the raw value
		Y = (byte)((opCode & 0x00F0) >> 4), // Eg. we want 0x4 not 0x40
	};

	// Loop up the OpCode using the first nibble and execute.
	opCodes[(byte)(opCode >> 12)](op);
}

// Misc has its own dictionary because it's full of random stuff.
void Misc(OpCodeData data)
{
	if (opCodesMisc.ContainsKey(data.NN))
		opCodesMisc[data.NN](data);
}
Ok, so now we have a function we can tick at 500Hz and it’ll decode an OpCode and call the correct function. Next we need to implement all of those functions!
I won’t go through all of them here on the blog but I’ll cover the first five from my code. The rest you can find on GitHub.
The first instruction (where the first nibble is 0x0) is actually two completely different instructions, one to clear the screen and one to return from a subroutine. There’s no point having another dictionary for these two so we just use a simple if.
/// <summary>
/// Handles 0x0... which either clears the screen or returns from a subroutine.
/// </summary>
void ClearOrReturn(OpCodeData data)
{
	if (data.NN == 0xE0)
	{
		// Our screen buffer is just an array of bools, so set them all to false when
		// instructed to clear the screen.
		for (var x = 0; x < ScreenWidth; x++)
			for (var y = 0; y < ScreenHeight; y++)
				buffer[x, y] = false;
	}
	// Otherwise we're returning from a subroutine. Here we need to pop the address of the stack
	// and set the program counter to it (we'll cover Pop/Push implementations below).
	else if (data.NN == 0xEE)
		PC = Pop();
}
There are two simple jump instructions, 0x1000 and 0xB000. One jumps directly to the address from the lower three nibbles (NNN) and the other does the same but adds on the value of the first register (V[0]).
/// <summary>
/// Jumps to location nnn (not a subroutine, so old PC is not pushed to the stack).
/// </summary>
void Jump(OpCodeData data) =>
	PC = data.NNN;

/// <summary>
/// Jumps to location nnn + v[0] (not a subroutine, so old PC is not pushed to the stack).
/// </summary>
void JumpWithOffset(OpCodeData data) =>
	PC = (ushort)(data.NNN + V[0]);
There’s a third jump instruction which is a “go to subroutine”. This does the same as above but we need to be able to return back to where we were when it finishes executing (it will end with the return instruction covered above). In order to preserve the return address we push the Program Counter (PC) onto the stack before jumping.
/// <summary>
/// Jumps to subroutine nnn (unlike Jump, this pushes the previous PC to the stack to allow return).
/// </summary>
void CallSubroutine(OpCodeData data)
{
	Push(PC);
	PC = data.NNN;
}
The next OpCode from my code is one that skips the next instruction if V[x] is equal to nn (both x and nn are taken from the OpCodeData we decoded). This is how the code branches based on conditions (eg. the next instruction might be a go to subroutine).
/// <summary>
/// Skips the next instruction (two bytes) if V[x] == nn.
/// </summary>
void SkipIfXEqual(OpCodeData data)
{
	if (V[data.X] == data.NN)
		PC += 2;
}
Something that was much easier to implement than I expected was the stack. It only holds 16-bit addresses so the implementations of Pop and Push are incredibly simple:
/// <summary>
/// Pushes a 16-bit value onto the stack, incrementing the SP.
/// </summary>
void Push(ushort value) =>
	Stack[SP++] = value;

/// <summary>
/// Retrieves a 16-bit value from the stack, decrementing the SP.
/// </summary>
ushort Pop() =>
	Stack[--SP];
Once all instructions are implemented, we need to implement Tick60Hz. All this does is decrement the Delay counter and cause a redraw. The draw function is an Action<byte[,]> supplied in the constructor so it’s up to the consuming code to get that on the screen.
public void Tick60Hz()
{
	if (Delay > 0)
		Delay--;

	draw(buffer);
}
Finally, we need to something to Tick the chip and draw to the screen. I used a simple WinForms app with a PictureBox which calls Tick and Tick60Hz at the appropriate times and implements the Draw and Beep actions that are passed into the chip like this:
void Draw(bool[,] buffer)
{
	for (var x = 0; x < screen.Width; x++)
		for (var y = 0; y < screen.Height; y++)
			screen.SetPixel(x, y, buffer[x, y] ? Color.DarkGreen : Color.Black);
}

void Beep(int milliseconds) =>
	Console.Beep(500, milliseconds);
That’s pretty much all there is to it! In addition to the other instructions, there are a few things I didn’t cover here (such as the built-in font, which has sprites for the characters from 0x0 to 0xF) but you can find all the code on GitHub (you’ll need to download the ROMs as mention in the README to run).
If you’re thinking of building an emulator but unsure where to start, Chip-8 is a great first project. Pretty much everything I’ve done in this one has been the same for the NES emulator I started (with the exception of rendering) so it’s all useful practice.
Edit: Using Bridge.NET, this interpreter can now run in your browser! Click here to see a live playable demo!.